What is MaxTAF?
MaxTAF (Maximo Test Automation Framework) is an add-on product for Maximo that provides automation of the testing that would otherwise have to be performed manually. It offers facilities for the production of test scripts and for the execution of these scripts. MaxTAF test scripts can be run individually or as part of a group of tests known as a test suite.
Every MaxTAF test run is captured in a run log, showing the success of the test, the execution time, the number and the nature of failures and an extensive test run report.
MaxTAF test scripts can be written/configured either in a proprietary MaxTAF XML style script language, or in Java using the JUnit testing framework. For the user interface types of tests, MaxTAF comes with a specialized version of the Selenium framework that enables the recording of the web browser sessions and their subsequent playback .
Before you start
If you are using MaxTAF for the first time, to ensure that it is correctly set-up for your use, please visit the section Post-installation checks.
MaxTAF Concepts
Test
MaxTAF test is a Maximo object that holds the definition of a specific test.
Test Run
Test run is a specific execution of a test.
Test Run Log
Test Run Log is a record in Maximo that captures details of a specific test run. The details include: test report, date-time when the test was run, length of the execution in seconds, number of failures if any.
Test Report
Test report is a part of the test run log that shows the test’s feedback on the run. It normally shows the Pass/Fail outcome of specific steps of the test.
Failure Log
When the test fails, a failure description is captured with the most detailed information about the failure.
Test Suite
A grouping of individual tests that are run together as a batch.
Test Case Application
The "Test Case" application is the place where you create and run MaxTAF tests. This application lets you
- add, edit, delete tests
- edit, save and compile MXML test scripts
- edit, save and compile JUnit test code
- set test run parameters
- run tests
- view the run log
- view test report
- view failure details
Test Case application screen fields:
Test Case:
Unique ID of the test
Description:
Test description
Test Script:
This is the name of the XML file or a fully qualified name of the java class responsible for the running of the test. (see below details for the "Edit Code" dialog)
Type:
The type of the Test. MaxTAF offers test scripting either in the propriatory XML language or in pure Java utilising the JUnit framework.
Parameters:
Test parameters that will be passed on to the test at the run time. Each test defines which parameters are required for the run.
"Run Test Case" button
This button runs the test. After the button is pressed, the Maximo server will start running the test.
"Run Test Case" button
"Edit Code" dialog
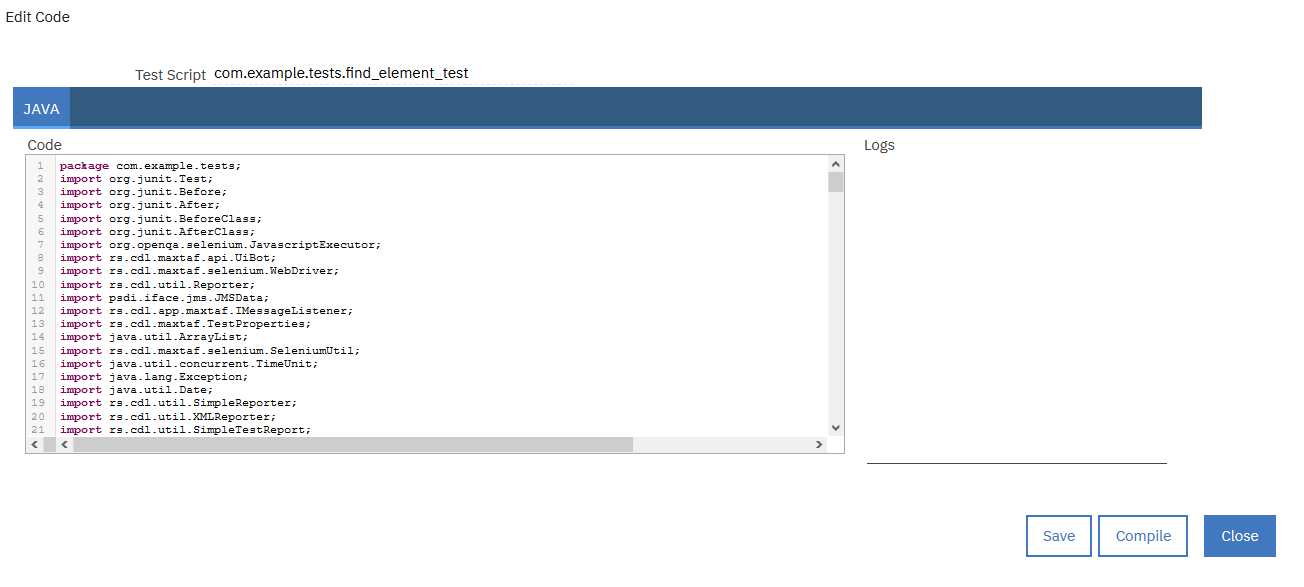
This dialog opens when you click on the pencil icon next to the Test script field.
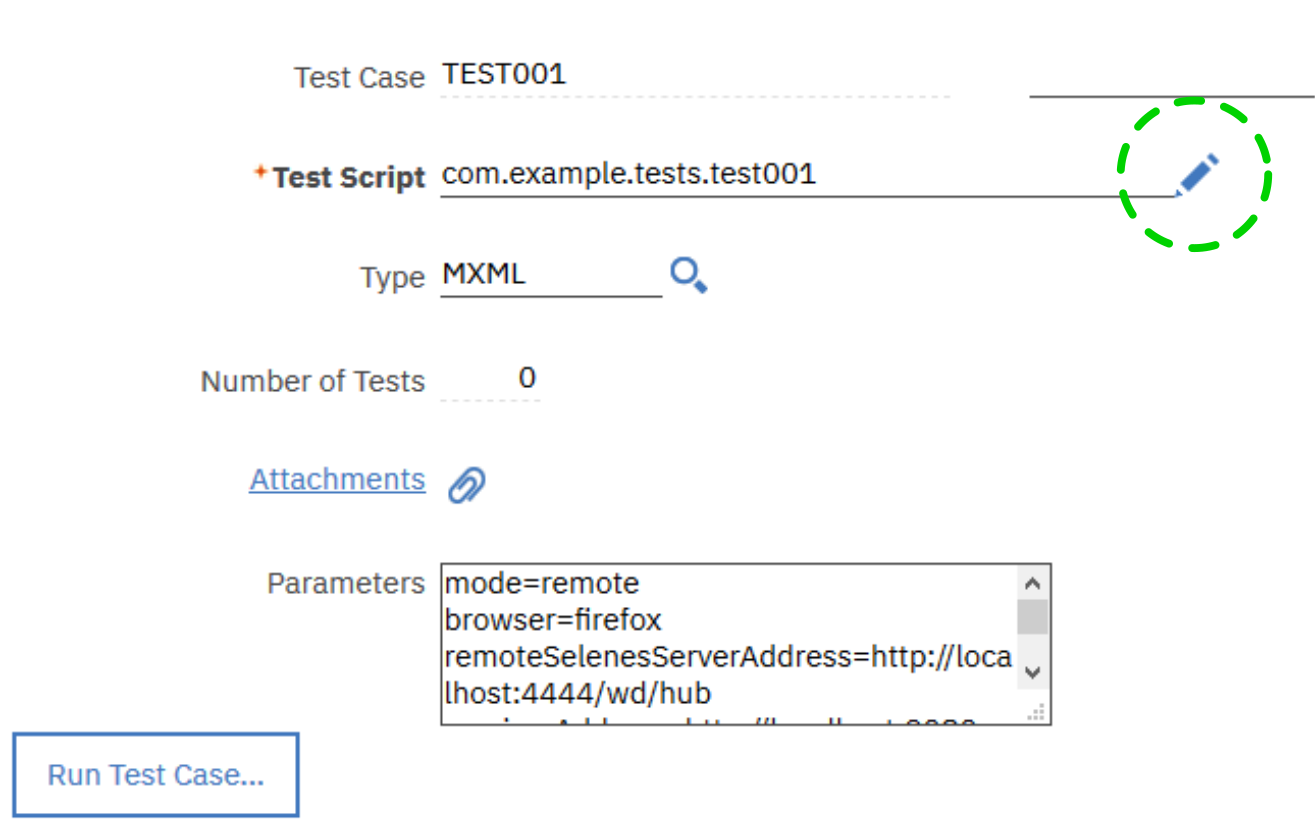
Pencil icon
Here, you can add, edit, save and compile your test script in either XML or Java style (depending on the type of test you specified in the "Type" screen field).
Screen elements:
Test Script:
The name of the file holding the script.
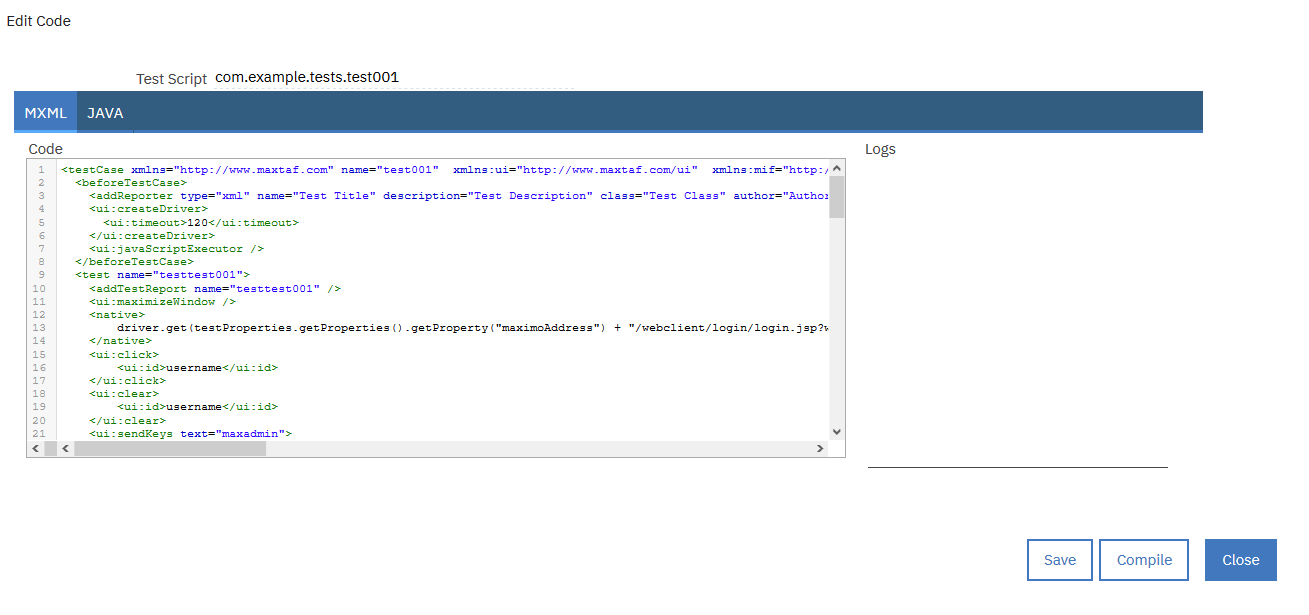
Code:
long text box that holds your XML or java code. In case of XML code, a separate tab will display java code compiled from XML. It is not possible to change this compiled java code.
Logs:
text box that will display the result of your Save or Compile action
"Save" button:
Saves your changes. You can also use a keyboard shortcut for this button Ctrl + S.
"Compile" button:
Compiles and instantly deploys your class file. Note: do not forget to first save your changes before you compile. You can also use a keyboard shortcut for this button Ctrl + Q.
"Close" button:
Closes this dialog.
"Test Run Log" table
Test Run Log table displays captured logs of individual runs of the test.
Test Run Log table screen fields:
Log Id:
Unique Id for the test run. Each test run is assigned a unique sequential number.
Elapsed Execution Time:
Execution time of the test.
Run Count:
The number of tests executed during the run. Note: One MaxTAF test can contain more than one JUnit or XML test within it.
Failure Count:
The number of failed tests.
Run Date:
Date-time stamp of the run
Test script:
Captures the name of the test class or XML file at the point of the run.
Test Run Log table - row details section
Report (row details section):
This is a test report about the run as created by the test class. The report can be presented in 3 different formats:- Plain text - the report is non-formatted text
- Html - the report is a web page presented in a browser control
- XML - the report is an xml document. The XSLT transformations are supported, meaning that if an XSLT template is provided and correctly referred to in the XML content, the xml document will be accordingly transformed and then presented to the user.
It is entirely down to the test class (and ultimately to the test class developer) to drive the format and the level of detail in this report. For more details see "REPORTS" section in the "MaxTAF Developer's guide".
Export Report button:
By pressing this button, you will get your report in a separate browser window from where you can view it in a larger pane or print it out.
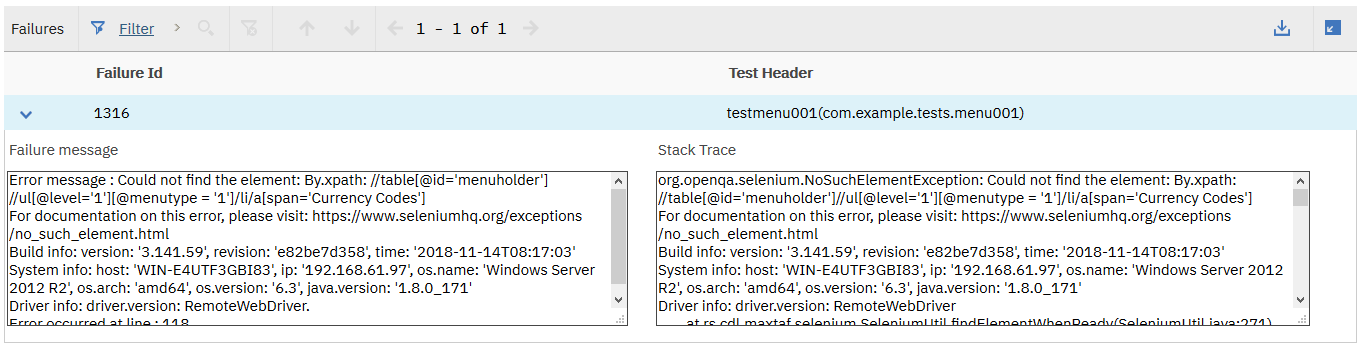
"Failures" table
Failure detail
Failures table captures test run failure details, if any.
Failures table screen fields:
Failure Id:
Unique Id for the failure
Test Header:
java name of the specific test (method name) that failed
Failure message:
(rowdetails section): error description
Stack Trace (row details section):
detail java error report known as "stack trace"
"Import Tests" Action
This menu option is available from the "List"
tab of the Test application. It lets you import new tests or update
existing.

To import, simply specify your import file and click OK button.
"Export Tests" Action
To export tests, activate "Export Tests" menu
option from the action menu of the "List" tab.
In this dialog, specify the export condition in the form of an SQL where clause applied to CDLMTEST table, e.g. "CDLMTESTNUM like ‘UATTEST%’".
XML file with the exported test cases can be found in the "<MAXTAF_DIR>\export" directory.
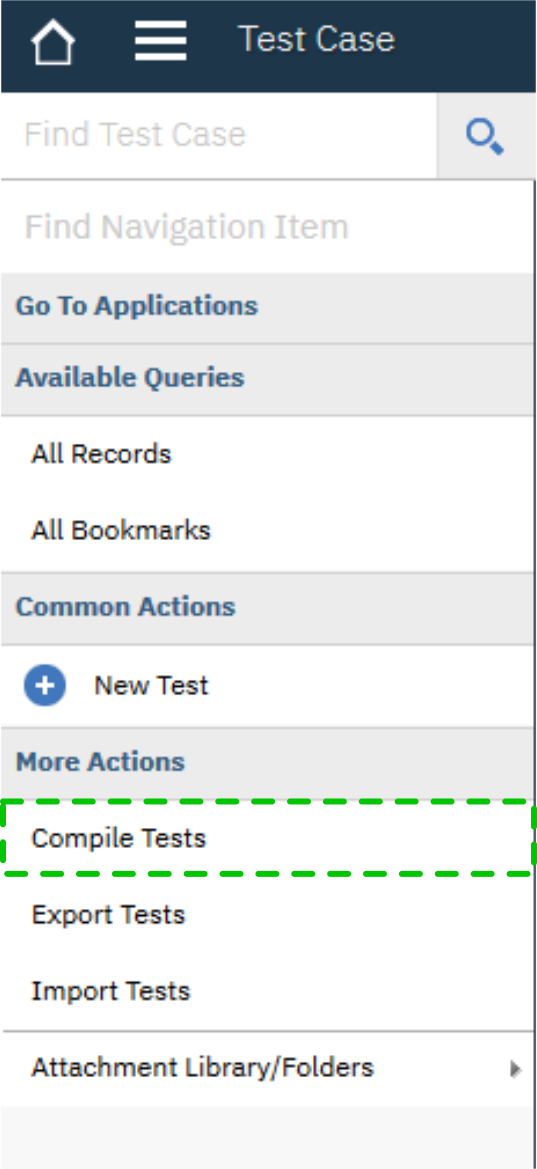
"Compile Tests" Action
To compile multiple test cases, select the "Compile Tests" option from the "Select Action" menu of the Test Case's List screen.
By default, all the test cases from the List screen table result set will be compiled.
In order to compile all of the test cases, make sure that test cases are listed in the table and that no filter is applied.
You can, however, compile a subset of test cases by filtering results of the List screen table.
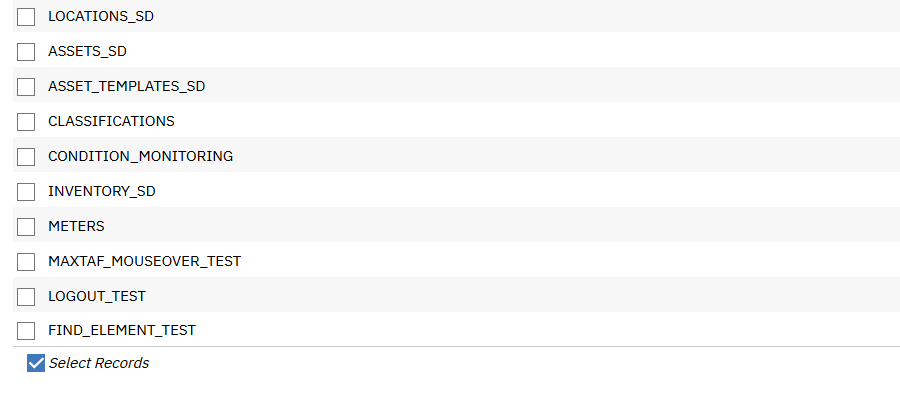
Alternatively, it is possible to select specific records from the List screen table by clicking the "Select Records" check-box on the bottom left corner of the List screen table. Once empty check-boxes show up to the left of the table records, you can select which of the test cases you want compiled.
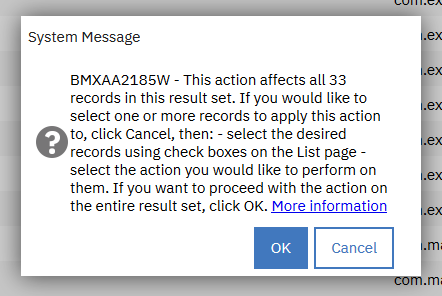
After clicking on "Compile Tests" the dialog will pop up, showing the number of test cases that will get compiled.
Click OK to start compiling the test cases.
Test Suite Application
"Test Suite" application
Test Suite application holds the definitions of test suites. Test Suites are the groupings of several tests that are run together.
Test Suite application screen fields:
Test Suite:
Unique ID of the test suite
Description:
Test Suite description
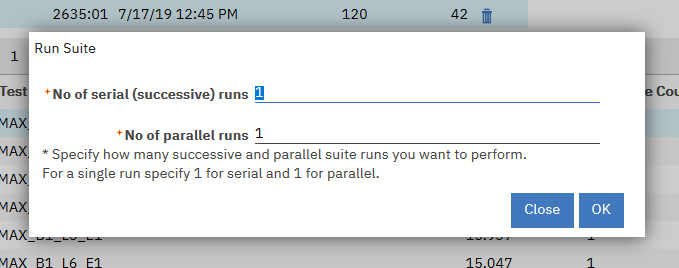
"Run Suite" button
This button triggers a run of the suite. When started, the run of the suite will in turn initiate a run of each test in order as defined by sequence number set in the Test tab. For more details on the individual test run process, please see section "‘Run Test’ button" under "Test Application" above.
When you click this button, the "Run Suite" dialog will be displayed first. In this dialog it is possible to enter the number of successive and parallel runs.
For a single run you can leave default values and just click OK to run tests. However, if you want to repeat test suite sequence, you can change default values. This is useful when doing stress testing.
To skip test suite run, you can click Close button.
Test Cases tab
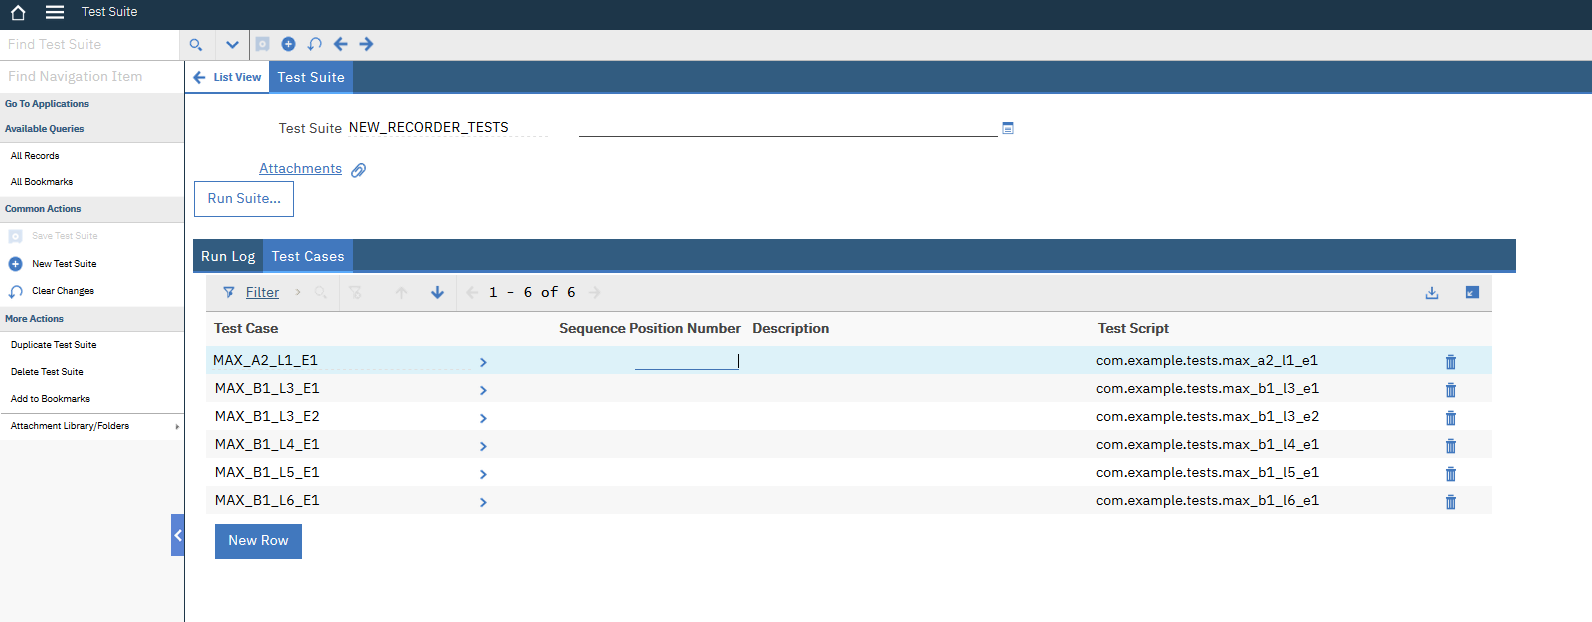
"Test Cases" Tab
The "Test Cases" tab holds test table.
Test Cases table
This table holds the list of tests in this suite. To add a new test, press "New" button.
Test Cases table screen fields:
Test Number:
You can type in your test number or use standard Maximo options: "Select Value" to select your test from list of Tests or "Go To Test" application, select your test and return with selection.
Sequence Position Number: Sequence used when running individual test for this suite
Description and Test script fields are set from originating test record and can’t be changed here.
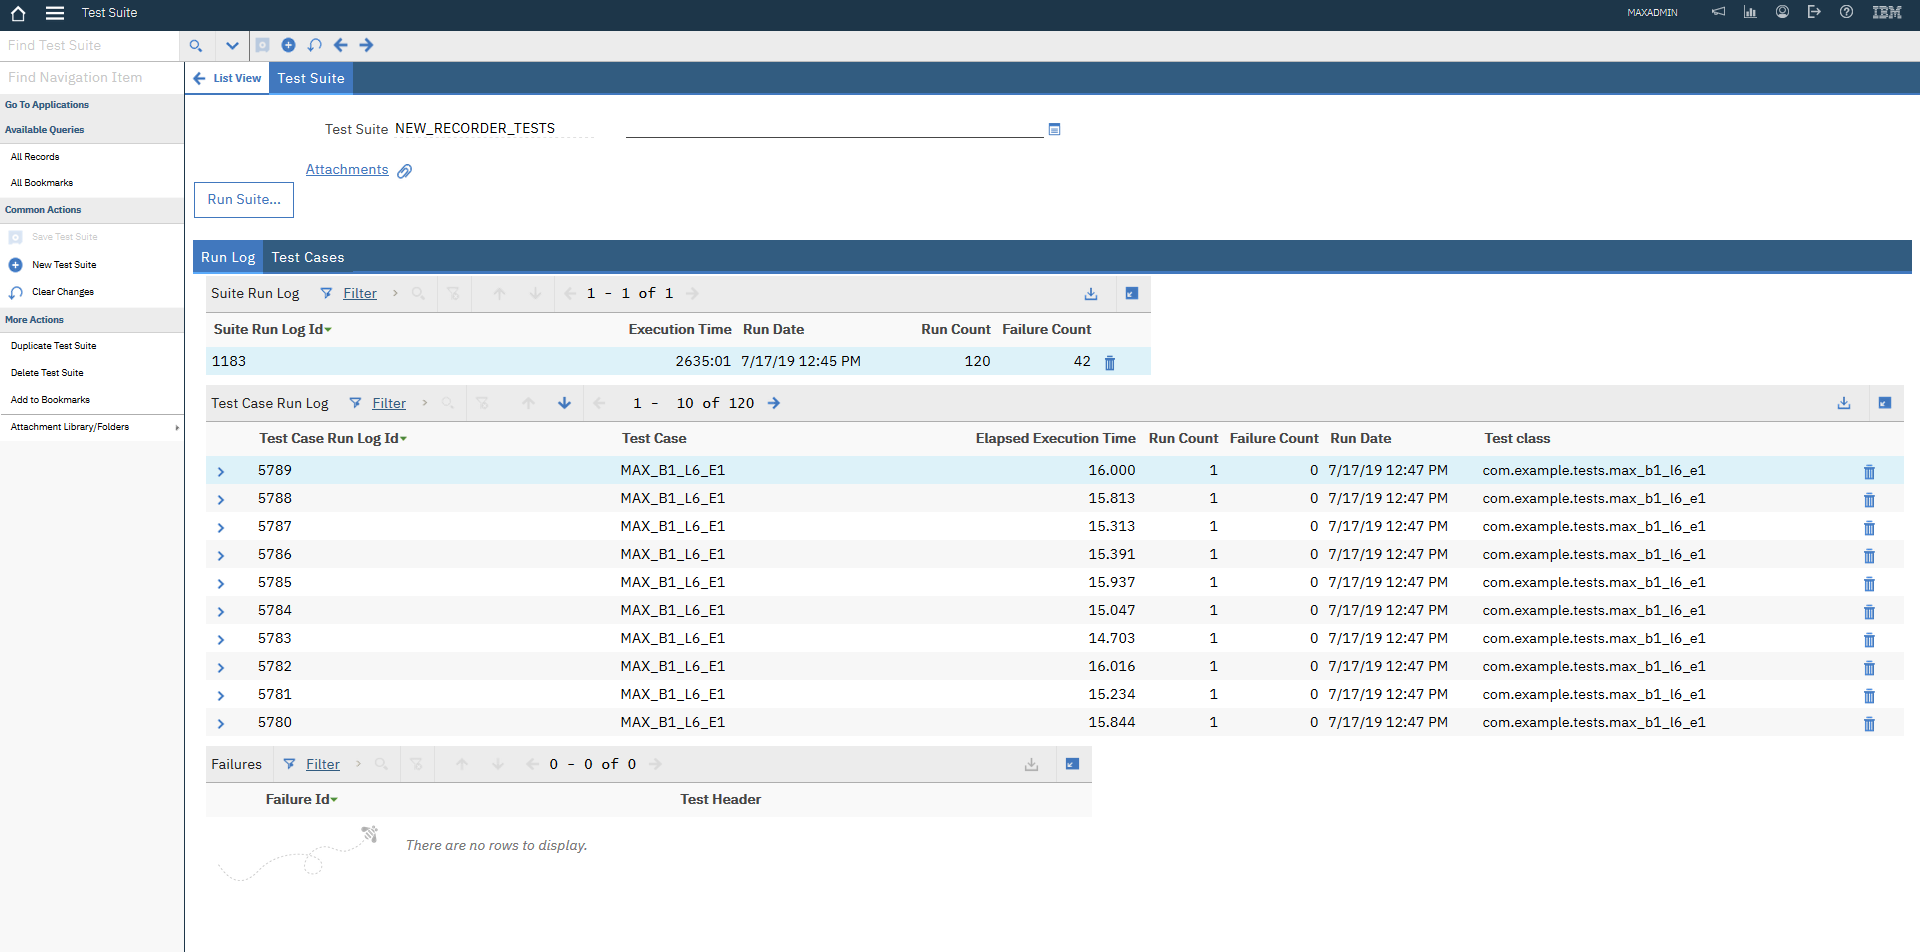
Run Log tab
This tab displays run logs of the suite.
Suite Run Log table
Suite Run Log table displays run details for the suite runs.
Suite Run Log table fields
Suite Run Log Id:
Unique Id for the suite run. Each suite run is assigned a unique sequential number.
Execution Time:
Cumulative execution time of the suite run. This is a sum of all test run times, as reported by the JUnit framework. It excludes any overhead time introduced by MaxTAF in preparation of the test run (for example it does not include time it takes MaxTAF to instantiate the test class).
Run Date:
Date-time stamp of the run
Run Count:
number of tests executed during the suite run.
Failure Count:
number of failed tests.
Test Run Log table
Test Run Log table displays run log for a specific test within the suite. For details, see section "‘Test Run Log" under "Test Application" above
Failures table
Failure Log Table displays failure details if any for the selected test record. For details, see section "‘Failures" under "Test Application" above
"Import Suites" Action
This menu option is available on "List" tab
and lets you import new test suites or update existing.
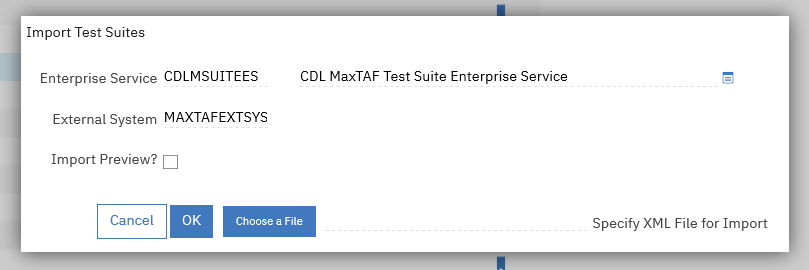
To import, simply specify your file and click OK button.
"Export Test Suites" Action
To export suites, activate "Export Test Suites"
menu option from the action menu of the "List" tab.
In this dialog, specify the export condition in the form of an SQL where clause applied to CDLMSUITE table, e.g. "CDLMSUITENUM like ‘UATSUITE%’".
Scheduled Runs
For when you want to run your tests or suites out of hours, MaxTAF has two cron tasks set up in the "Cron Task Setup" application.
MaxTAFRunTestCronTask - This cron task runs tests. To activate, add a new instance and for the parameter "testnum" name the test you want to run.
MaxTAFRunSuiteCronTask - This cron task runs suites. To activate, add a new instance and for the parameter "suitenum" name the suite you want to run.
For more information on setting up cron task instances, consult the Maximo System Administrator's guide.
How Do I...
Run a test case
- Open Test Case application form Go To/MaxTAF menu
- Select your test case
- Click the "Run Test Case" button
Run a test suite
- Open Test Suite application form Go To/MaxTAF menu
- Select your Test Suite record
- Click the "Run Suite" button
- In the dialog that opens, enter the number of serial and parallel runs of the suite
- Press OK
Create a new test case
- Open Test Case application form Go To/MaxTAF menu
- Add a new test case
- Choose the type of your test: MXML or Java.
- In the "Test Script" field: For MXML tests, specify the file name. For Java tests, specify a fully qualified class name. If your class is already deployed on the server then your class name must reflect its full name i.e. must have the package name precede the class name. If you are intending to use "edit code" facilities to create your class, then how you name the class is entirely down to you.
- Click on the pencil icon to edit, save and compile your test script.
Create a new test suite
- Open Test Suite application form Go To/MaxTAF menu
- Add a new record
- If not opened, open the "Test Cases" tab
- Add the desired test cases by clicking the "New Row" button. Note: you can only add tests that have been previously created in the Test application.
Deploy test code/script
If you have a compiled test class (e.g. you developed and compiled it in Eclipse) then:
- Place the class in the correct Maximo application directory,
- Rebuild ear
- Redeploy ear (see Maximo admin guide for more details)
- If you want to create your test class directly in MaxTAF, then:
- Name the class in the "Test Script" field
- Click the pencil icon next to the test script field, which will open the Edit code dialog
- Type or copy/paste your code
- Press the Save button to save code
- Press the Compile button to compile and deploy
- Close the dialog and try it out by running the test.
- If you receive compiling error caused by any library class missing, you can add new library in MaxTAF Administration application
Modify test code/script
- Click the pencil icon next to the test script field, which will open the Edit code dialog
- Type or copy/paste your code
- Press the Save button to save code
- Press the Compile button to compile and deploy
- Close the dialog and try it out by running the test.
Check test run results
After the completion of a test run, a log is created which can be seen in the Log table at the Test screen. The logs are by default ordered in a descending date order so your latest log should be at the top.
Check suite run results
After the completion of a suite run, a log is created which can be seen in the Log table in the "Run Log" tab on the Test Suite screen. The logs are by default ordered in a descending date order so your latest log should be at the top.
Import Tests
-
From "List" tab of "Test Case" application, choose "Select Action" - "Import Tests"
or
From "Integration" - "External System", select MAXTAFEXTSYS
- Go to "Enterprise Services" tab
-
Select "CDLMTESTES" and click "Data Import"
or
Drop your import file into the <MAXTAF_DIR>\import directory, where <MAXTAF_DIR> is MaxTAF directory as specified in the MaxTAF Administration properties.
Export Tests
-
From "List" tab of "Test" application, choose "Select Action" - "Export Tests"
or
From "Integration" - "External System", select MAXTAFEXTSYS
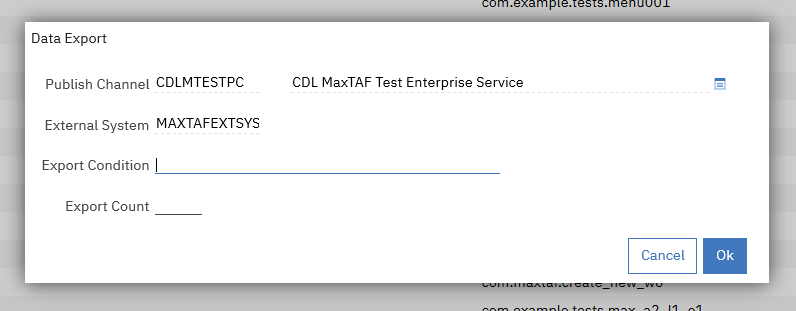
- Go to "Publish Channels" tab
- Select "CDLMTESTPC" and click "Data Export"
Import Suites
-
From "List" tab of "Suite" application, choose "Select Action" - "Import Test Suites"
or
From "Integration" - "External System", select MAXTAFEXTSYS
- Go to "Enterprise Services" tab
-
Select "CDLMSUITEES" and click "Data Import"
or
Drop your import file into the <maxtafdir>\import directory, where <maxtafdir> is MaxTAF directory as specified in the MaxTAF Administration properties.
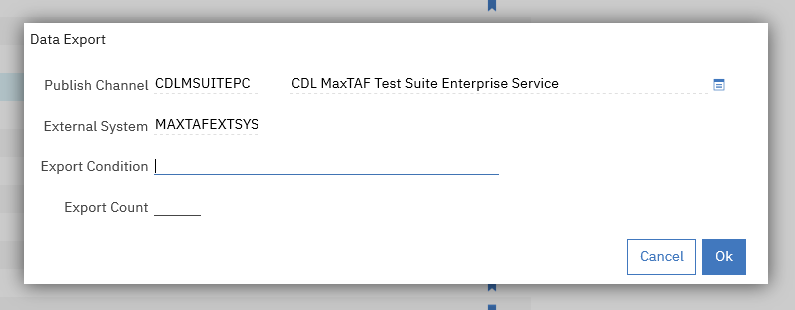
Export Suites
-
From "List" tab of "Suite" application, choose "Select Action" - "Export Test Suites"
or
From "Integration" - "External System", select MAXTAFEXTSYS
- Go to "Publish Channels" tab
- Select "CDLMSUITEPC" and click "Data Export"
- Note: Before importing Suites, ensure that all the tests in the suites are already in Maximo.
Post-installation checks
This section contains details on some quick checks that you can preform to ensure that your MaxTAF installation is complete.
Check the setting for the MaxTAF directory
As part of your MaxTAF installation, you would have specified the MaxTAF directory where all the MaxTAF related files are kept.
To check, and possibly change this entry, from the "Go To" menu, choose MaxTAF - MaxTAF Administration module.
"directory" property - It is critical that this directory is visible to your Maximo server, i.e. the Maximo server can access this directory using the specified path. Also, the Maximo server needs to have read-write privileges for this directory.
Check Static ID
If you have decided to use static id's (see "UI Tests" section in the "MaxTAF Developer's guide"), and then further decided that static id's should be permanently switched-on, check the following:
In the "MaxTAF Administration" application check that a property with the following details exists:
Property: global.static
Description: Static ID
Value: -1
Check Browser
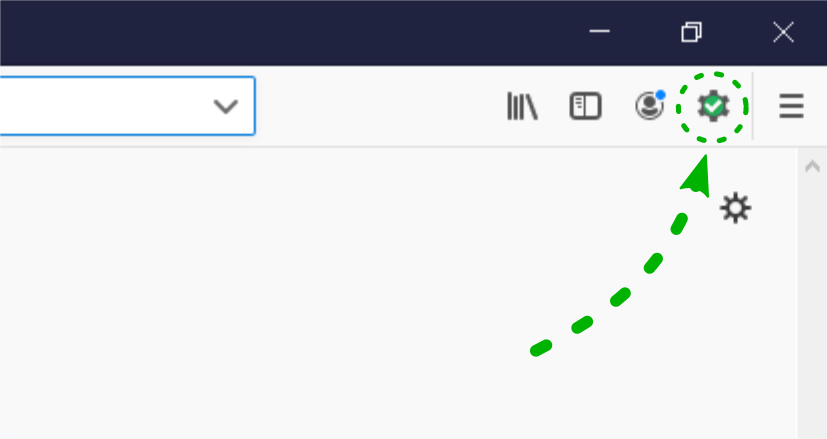
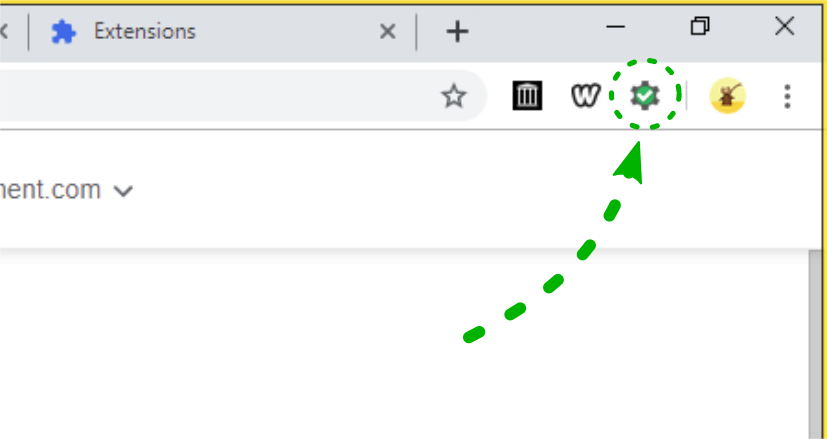
To perform recording of Maximo sessions (see "Recording UI tests" section in the "MaxTAF Developer's guide"), you will be using Firefox or Chrome with the addition of the MaxTAF Recorder addon. To ensure that this is all in place, perform the following checks:
In the browser:1. Check that the icon for the MaxTAF extension is present in the top corner of the browser
2. Open MaxTAF Recorder
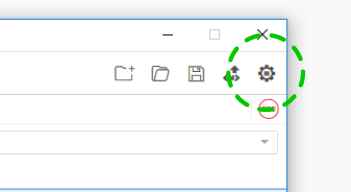
3. When the initial dialogue opens, confirm that "Remote Server Address" (the address of your Selenium server) and "Maximo Address" are the correct values your environment, as these parameters will be set as Test Parameters when you import test into Maximo (MaxTAF)
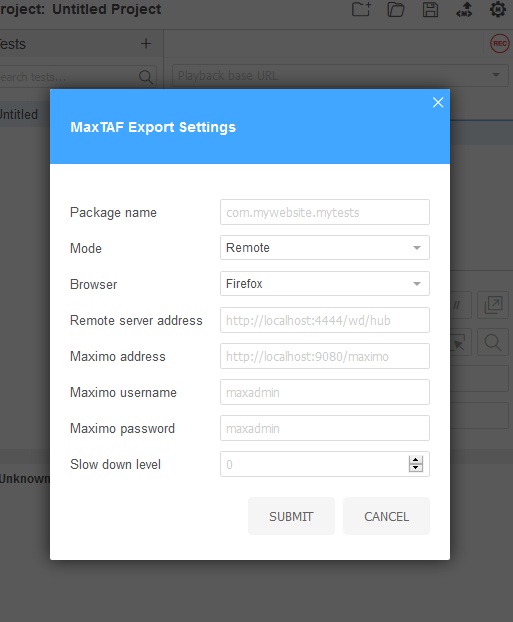
4. If you need to bring the settings back up, click on the export settings icon shown below.
Check Security
By default MAXADMIN group can access MaxTAF. Anyone else needs to be separately authorized. Check if you have access to:
Test application
1. Fields
2. Log table
• Report
• Export Report button
3. Failures table
• Failure message
• Stack Trace
4. Run Test
• Run UI Test
• Run Java Test